Upgrading old cluster with glow gauges in a 97 civic
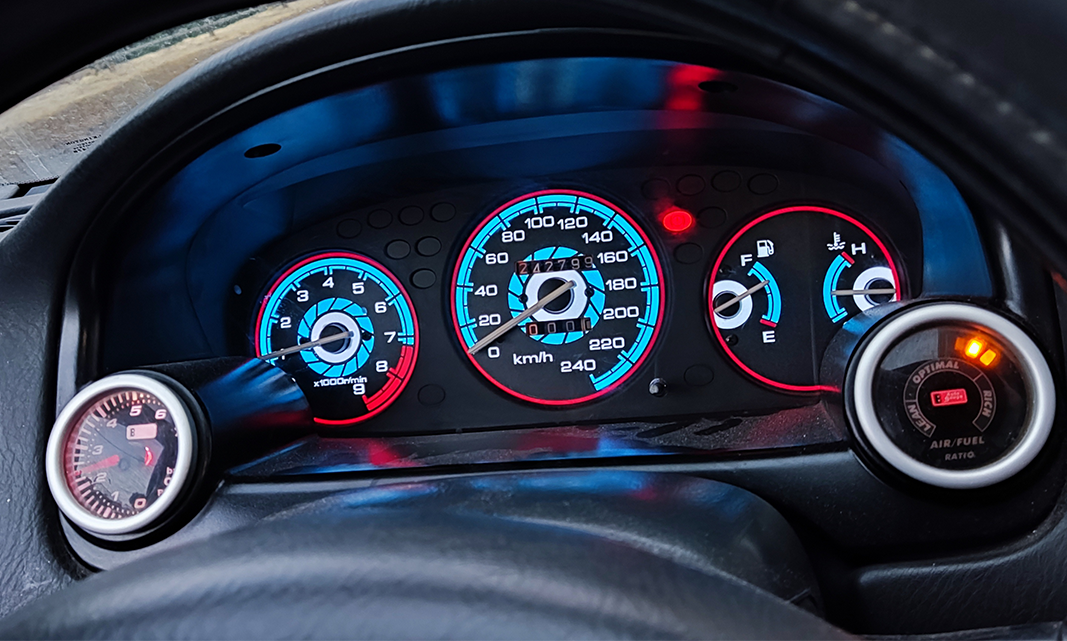
Glow gauges are a great way to massively improve the looks of your gauge cluster and its readability. Also, a great way to add a hint of personality to your car !
In my first attempt to improve the instrument cluster, I had installed green LED bulbs from AliExpress, but the bulbs were so bad that you could barely see the dash at night! I eventually stumbled on a good deal on eBay on this set of glow gauges. Glow gauges use electroluminescent sheets that light up, resulting in a beautiful, uniform glow.
Step 0: Remove the instrument cluster

Removing the instrument cluster is pretty straight forward. Firstly, remove the 2 screws holding the front panel and pull it out, Then unscrew the 4 screws holding the cluster. Finally, unplug the cluster.
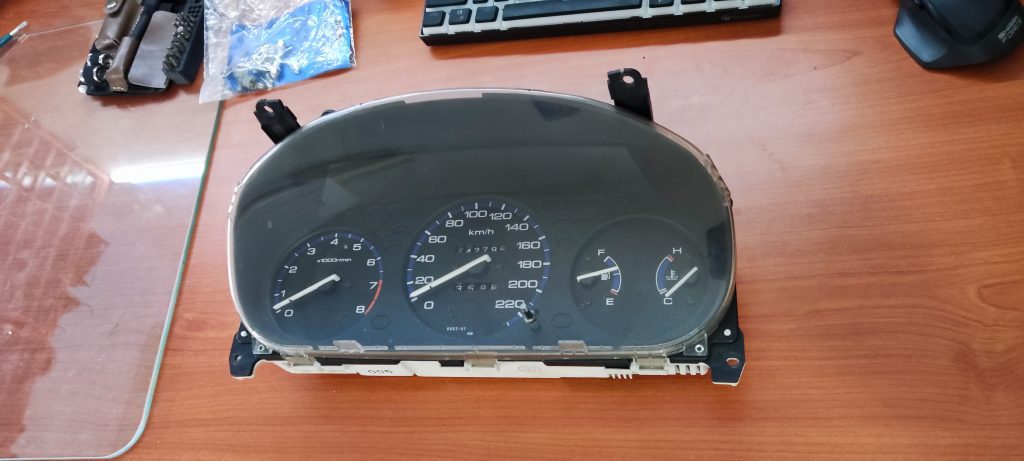
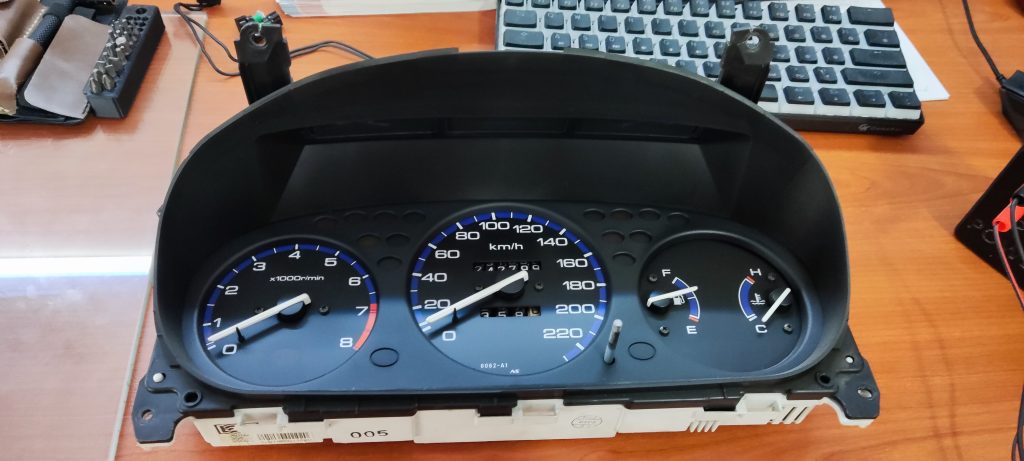
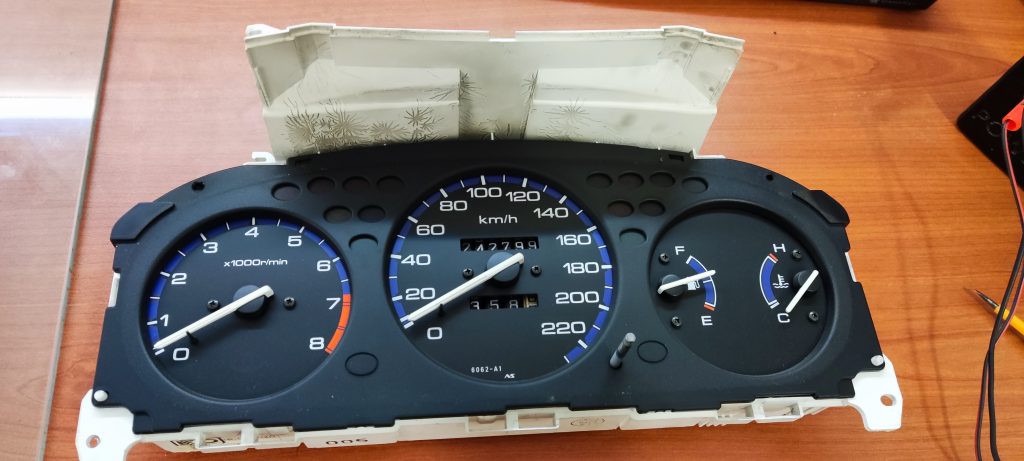
Step 1: Disassemble the cluster
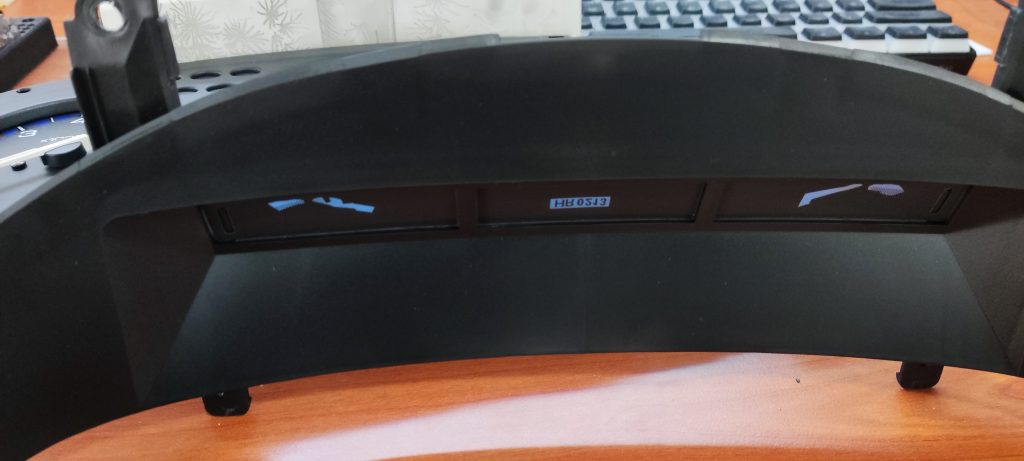
Disassembling the cluster is a quite simple progress, so get comfortable in a clean environment. This is also a good opportunity to check and change any burnt bulbs. The only important gauge bulbs are the three in the middle that light the odometer and the 2 at the top that light the needles. The 2 top ones are very important, you can’t put any bulb there. As you can see in the image below, there is a mask that allows light in a certain way so that it illuminates only the needles, a truly marvelous design feature. But it is designed to work with standard incandescent lights (maybe a diffused LED strip mod?).
Next, start by removing the visor, shroud and the meter panel. They are simple held on by plastic clips, so slowly start unclipping them one by one with a flat head screwdriver. This is also a great opportunity to clean any dust or dead spiders that have gathered inside.
Step 2: Installing the glow gauges
This is the tricky part. Start by removing the screws on the cluster. Then carefully finagle the glow gauges on the needles. You will have to carefully move the needles and slide the glow gauge in, you might have to bend it a little to get it under the base of the needle so that it can fit from the other side. Be careful not to bend them too much. The hardest part is the fuel and temperature gauge. You will have to move one gauge up and pass the glow gauge through. Then move the other one up and align it to the hole. Then screw them back in, be careful not to overtighten.
After installing the glow gauges, we will have to get the wires out of the cluster. In my case, I did not have abs or cruise control. So I used the slots for the PCB to pass the wires through, as you can see in the pic bellow. Also, depending on the kit you get, you might have to trim some plastic parts for the wires to fit. Do that carefully and try not to live any pieces inside.


If you can’t find a gap to pass the wires, you will have to create one. I would recommend that you avoid drilling, so that particles don’t get on the sensitive mechanisms. One alternative is to use a soldering iron on low temperature to melt a hole, or use side cutters. Then start assembling the cluster and clean any fingerprints etc. on the way.
Step 4: Wiring and installing the cluster
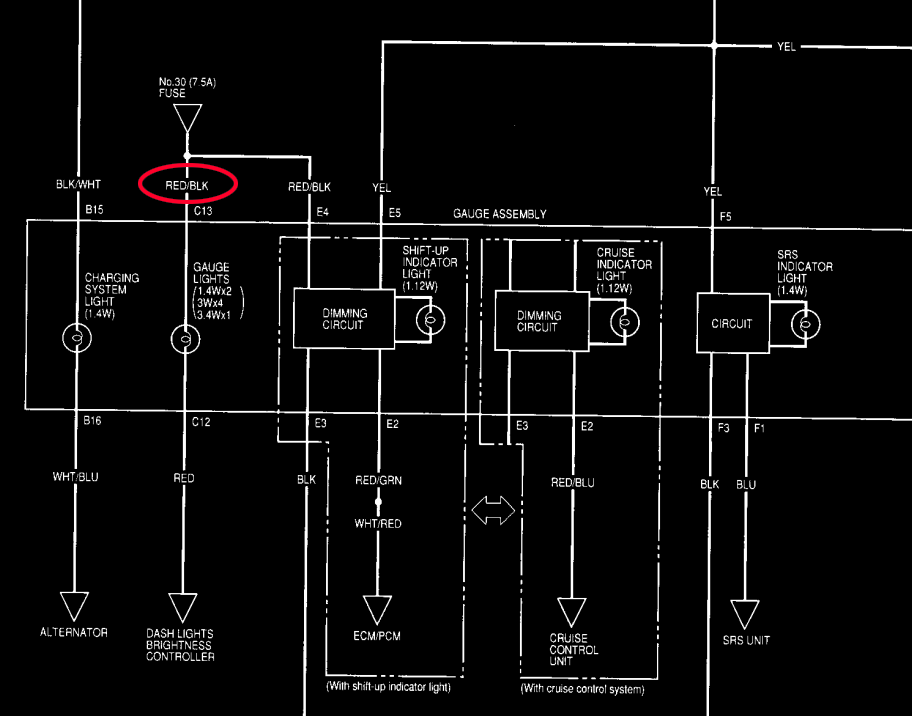
As for the wiring, you only have to wire the power supply to the dash light power source. Again the service manual is really helpful, we see that the gauge lights are at the Red/Black wire. Next we need a ground, I found one at the top connector (Black wire). Always verify your wires just in case. For the ground, measure voltage to the body with the ignition on and off (make sure it’s 0v). And then buzz it to the body, and it should buzz.
For the power also measure with ignition on/off and with the lights on, make sure it has 12v only with the lights on. I zip tied the power supply to the support beam, and left the brightness adjuster in the dash. I don’t really use it, but you could mount it to the dash. Finally, install the trim pieces and the dash just like you removed them, and enjoy.