Ultimate Ender 3 upgrade guide
This is my 3d printer. There are many like it, but this is mine.
My 3d printer is my best friend. It is my life. I must master it and upgrade it as much as i can.
-me
My 3d printer is perhaps the most useful tool that I have. It’s a Creality Ender 3 that I got back in 2019 for ~160€. Since then, I have done multiple upgrades. It has almost become the ship of Theseus paradox. Below you will find all the upgrades I have done so far, and my experiences from this long journey. I will try to get a detailed guide for each upgrade in the future.
- Step 0: Preventative maintenance
- Step 1: Main board upgrade
- Step 2: Touch screen TFT screen
- Step 3: Upgraded bed springs
- Step 4: Upgrading the hotend
- Step 5: Klipper
- Step 6: Automatic bed leveling
- Step 7: Print surface
- Step 8: Filament dryer
- Step 9: Voron Stealthburner
- Step 10: Filament runout detector
- Step 11: Power relay
- Step 12: Additional illumination
- Extruder
- Future plans
- Is it worth it ?
Step 0: Preventative maintenance
Not sure if the same applies today. But back in the day, Creality did not have the best quality control. Out of the box, make sure all the belts are tight, and all the eccentric nuts are properly adjusted. Also, the z axis rod needs to be greased, I used lithium grease and to this day it’s holding up great.
Common power supply XT60 plug issue
A common issue on some of those old Ender 3 was the XT60 plug on the power supply. Some were of very poor quality resulting in overheating and some occasions they caught on fire! So keep an eye if it gets hot on your first prints, and if needed change it.
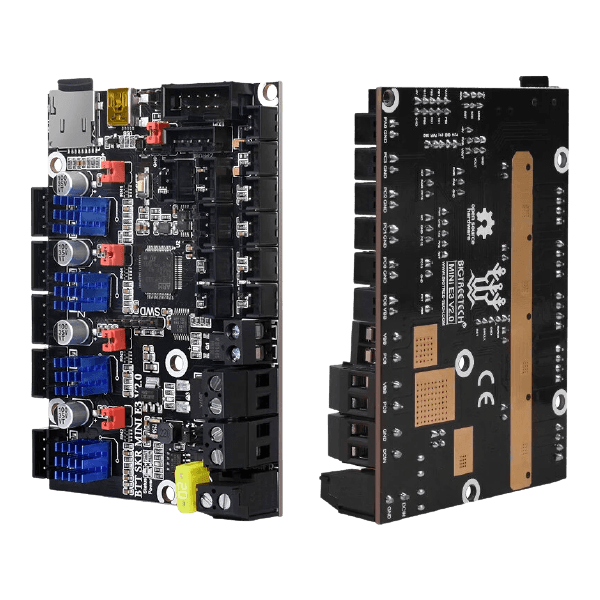
Step 1: Main board upgrade
One of the first upgrades i did was a BTT (Big Tree Tech) SKR mini E3 V2. The upgraded board has better silent stepper drivers and multiple ports for future upgrades. By default, these run Marlin, but later we are going to upgrade to Klipper.
Step 2: Touch screen TFT screen

I got a BTT TFT35 discounted as a set with the main board. Its an unnecessary upgrade, but it is a great quality of life improvement if you are going to use marlin without using octoprint. It has a nice colored touchscreen and can also run in legacy mod like the old display. Unfortunately, after 2–3 years it stopped working and had to revert to the old display. But with klipper it is not that needed.
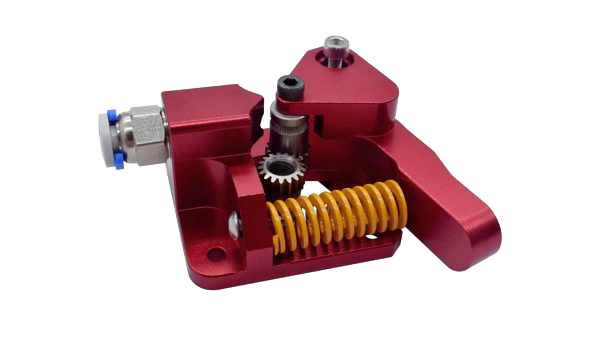
Step 3: Upgraded bed springs
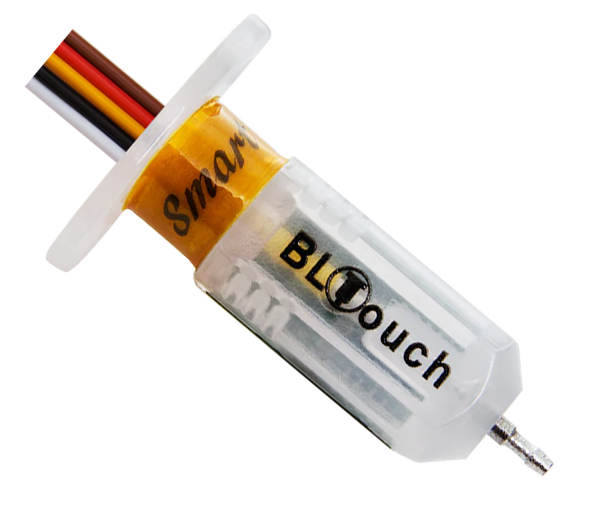
A set of upgraded bed springs will help keep the bed leveled for a longer time. It is definitely worth upgrading the stock ones, they are quite cheap. If you also add or already have a bl touch, you can add rubber bushings instead of springs.
Step 4: Upgrading the hotend
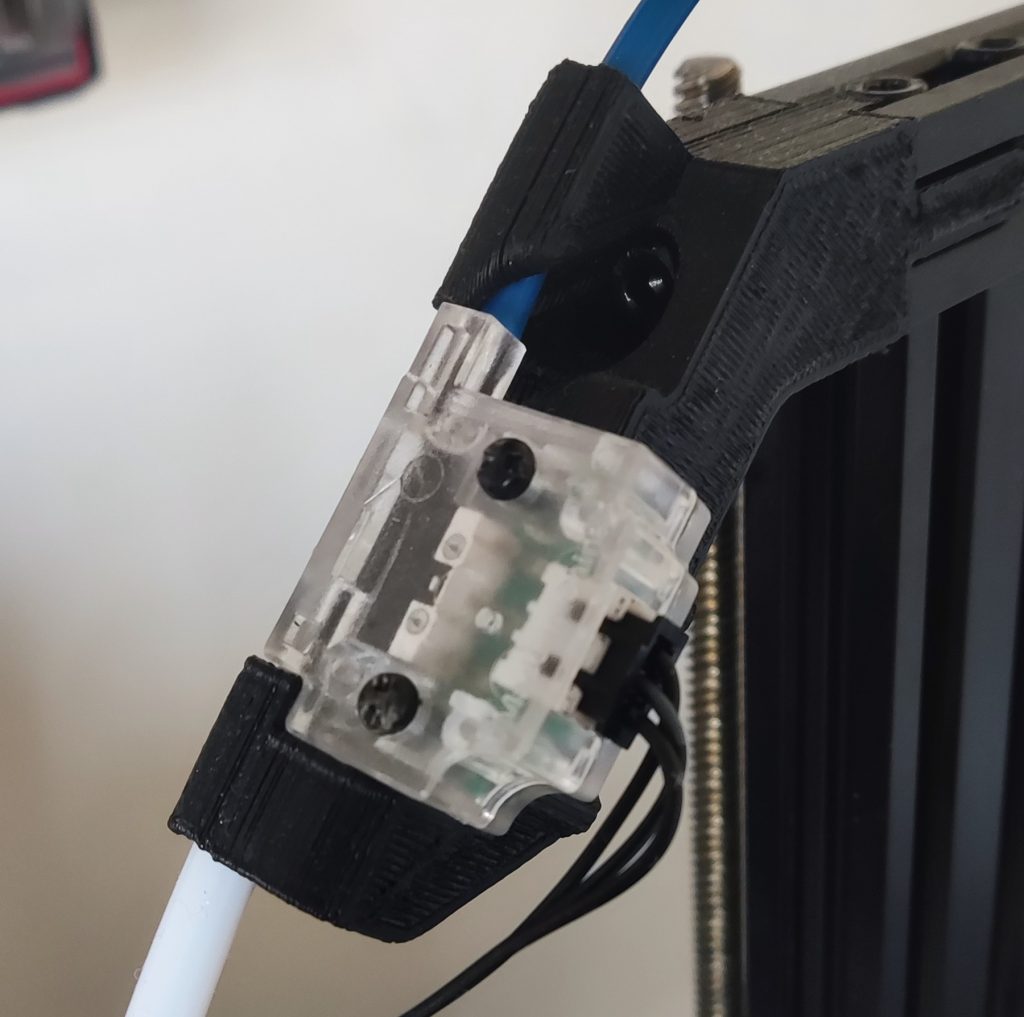
The stock hotend is ok-ish, but it is not full metal. That means the PTFE tube touches the nozzle causing it to wear quickly, resulting in clogs. Also, it limits you to only printing with PLA as higher temperatures degrade the PTFE tube faster. Upgrading it will allow running at higher temperatures and printing with filaments like PETG and ASA.
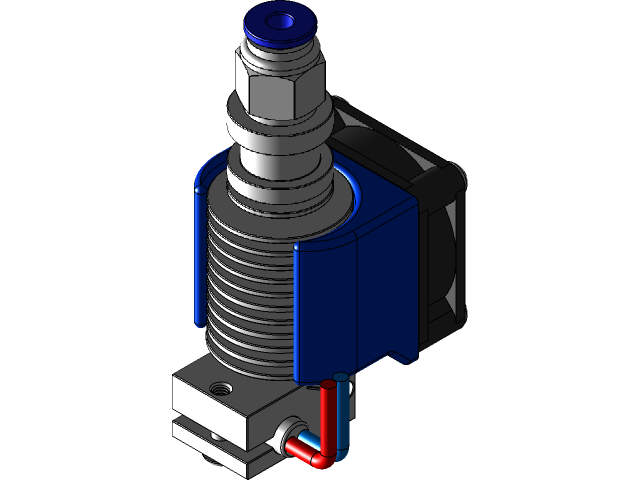
The nozzle I chose to replace the stock one with was an E3D v6 hotend clone. This is where I made the mistake and got the cheapest available clone for ~20€ from banggood. The heatblock had very bad fitment resulting in a large leak rendering it unusable. I got a nickel plated copper heatblock and titanium heatbreak from triangle labs. The quality was great, still working til this day.

As you can see in the image above, the included fan shroud did not seat correctly, and it would rotate while printing. Also had to print a bracket to zip tie the wires to for stress relief, and another bracket for the bltouch.
Step 5: Klipper
One of the first upgrades you should do after installing a new main board. You will need a decent raspberry to run it, i 3d printed a case for it to install it under the display. I used a pi4 running MainsailOS. Klipper allows you to change the configuration without having to compile and flash the firmware every time. All you have to do is change a text file and reboot. This makes all future modifications far easier. You can also add a camera to your pi for monitoring.
Klipper basically gives you full control over your printer, allowing you to configure your own macros and automations. The hardest part is the initial configuration and calibration, it is also an educational part. You will learn a lot about your printer. Also, pressure advance calibration is amazing.
Step 6: Automatic bed leveling
It is a must, no more wasted time and frustration manually leveling the bed. I got a cheap clone and works great, all the accuracy tests I did came out relatively consistent. And so far it is working great, even though i may have crashed it a few times. Also, if you also suffer from a “taco” bed (warped bed) it is the ideal solution.
Manual leveling tip
If you don’t have automatic bed leveling and have to do it manually, don’t use a piece of paper. Set the z height to 0.2mm and get a 0.2mm feeler gauge. Level all the corners and the center using the feeler gauge. After that, do a one layer test print and adjust the z offset on the fly. This works great, but it will not help if the bed is warped.
Step 7: Print surface

A nice printbed helps a lot with adhesion, I got a glass Creality bed. I avoided magnetic beds because they tend to demagnetize at high temperatures. Also, it helps level the print surface if it is warped. What I really liked about this bed is the coating it has, it offers great adhesion and once the bed cools parts detach on their own. No need for hairspray or glue, just wipe it with alcohol before every print.
Step 8: Filament dryer
There is nothing more annoying than using a roll of filament that has been opened for a while and getting awful print quality because of the trapped humidity. Especially with hygroscopic filaments. For this reason I got an e-sun dryer, and it has been great, my only complaint is that filaments with cardboard reels don’t fit. The print quality has massively improved when printing with old filaments.
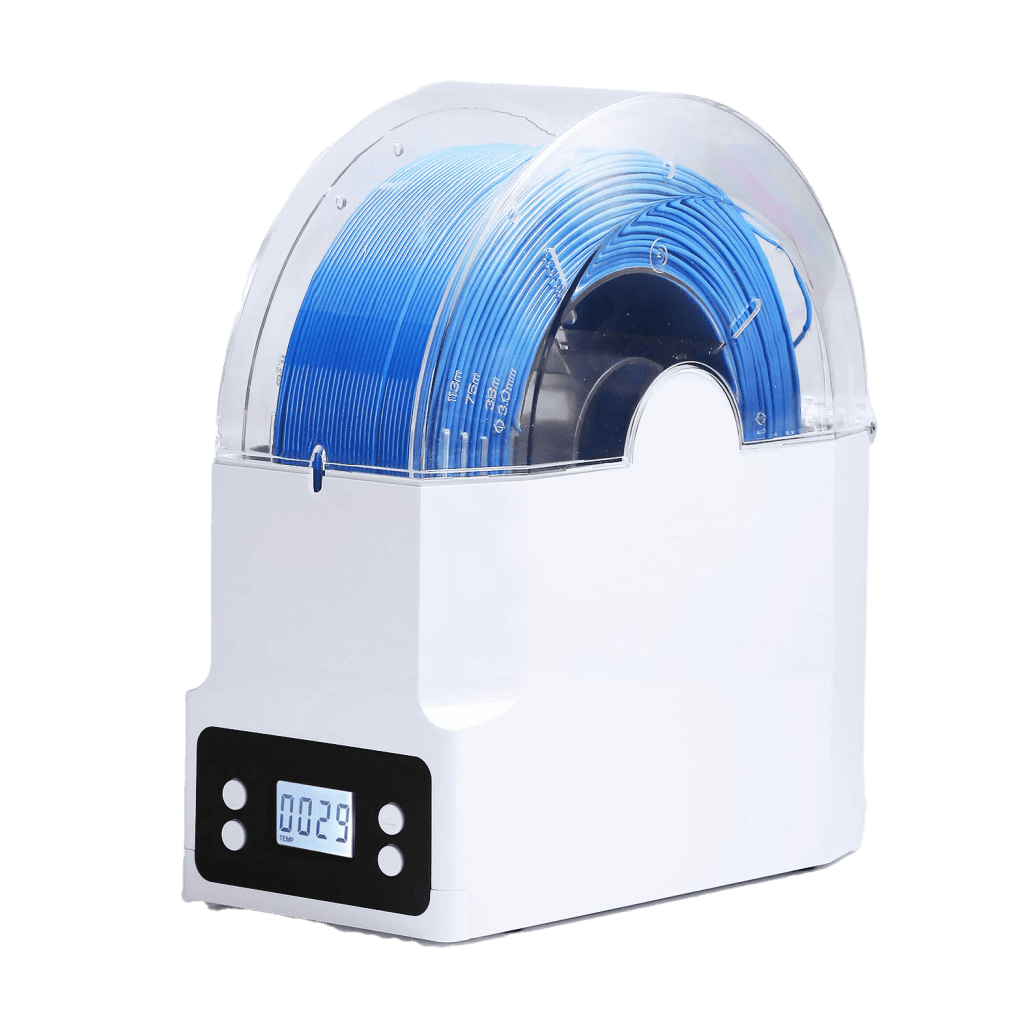
TIP: When you open a new filament, put the desiccant bag in the middle of the roll while it’s in the dryer.
Step 9: Voron Stealthburner
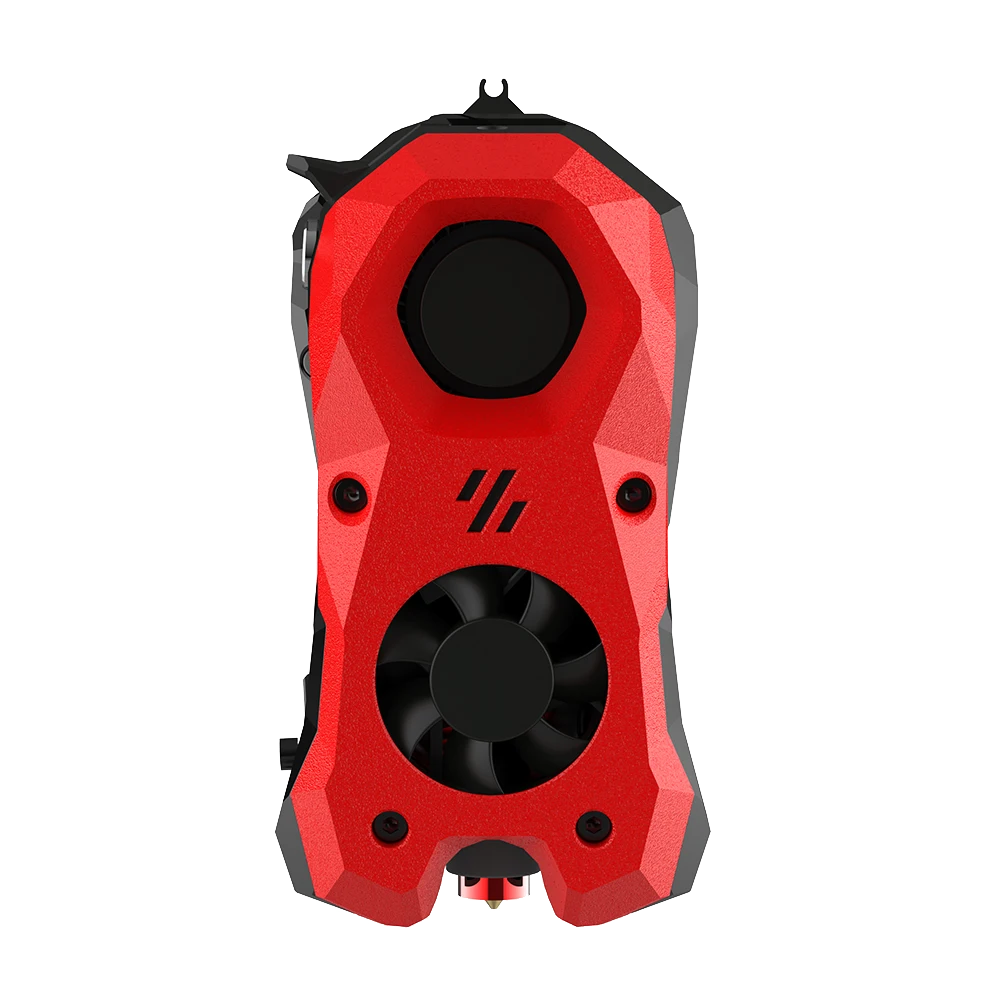
The Voron project is really amazing. Using an adapter plate from Thingiverse you can mount it on your Ender 3. The manual, parts and engineering behind is really a work of art. You can find the STL, manuals, and BOM here. I 3d printed all the files with ASA and got all the parts from AliExpress. I chose the cheapest parts, including a hardware kit for the screws. The only part you should not cheap out on is the BMG mechanism. Get the official one or the triangle labs one. I got the triangle labs one and it’s holding great.
The benefits
The performance is really amazing, some of the benefits are:
- Direct drive extruder
- Supports multiple hotends
- Phenomenal part cooling (a bit overkill for a non-enclosed printer)
- RGB! And illumination on the nozzle
- Very good hotend cooling
- Can print TPU (even has integrated anti squish mechanism)
- Nice bed leveling sensor mount
- Input shaping sensor mount
And there is probably more that I am forgetting
Tips
I rerouted all the wires to the side and made a hole with a 3d printed grommet to hold the wires for stress relief, along with a 3d printed gable chain.
Make sure to lube the bearings and the gears on the contact points if they are not already lubed. I used lithium grease. You will also have to reset and recalibrate pressure advance and tune the extruder steps and flow.
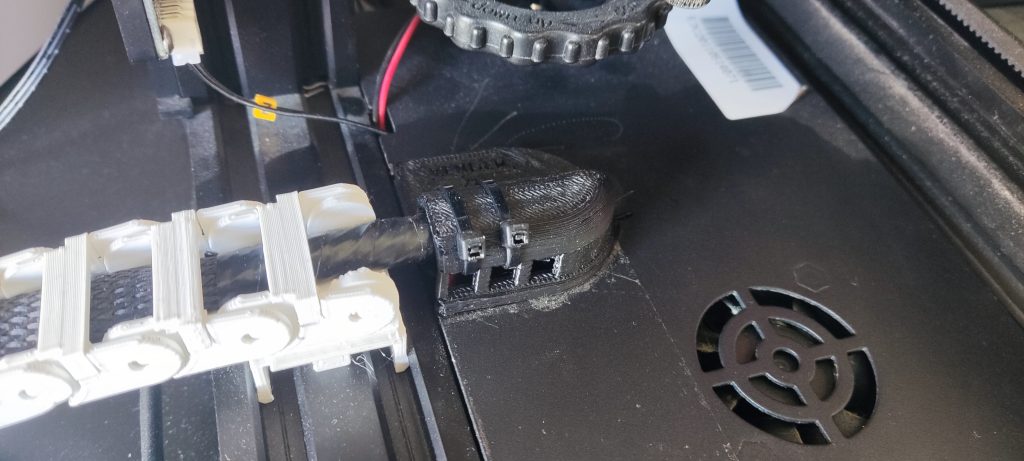
Step 10: Filament runout detector
There are two options here. One is the cheap, simple runout detector that is basically a switch. And there is the filament detectors that use optical sensors and rotary encoders that can also detect jams and clogs. I got one of the cheap ones to have just in case. I 3d printed a base that also has holes for the tubes from the filament dryer and the PTFE tube going to the hotend assembly. I had to tap the hole to be able to screw the base but other than that it was an easy installation.
Step 11: Power relay
Being able to automatically or remotely shut down the printer is a pretty nifty feature. I used the BTT relay V1.2 with a 3d printed enclosure. Do be careful when installing, because it cuts the AC voltage of the power supply. It may not be that well documented, but it works.

Step 12: Additional illumination
Having some extra lights for the camera or for general visibility is a great idea. One thing I noticed is that the channels in the aluminum extrusions fit an LED strip perfectly. I added an LED strip to the top extrusion looking down at the bed. I recommend a “waterproof” led strip so that it does not come in contact with the extrusions and shorts, also make sure to insulate the solder points. To power it, you can use a buck converter if you have a 24v supply, and optionally add a switch. Also, it’s important to add a fuse as close to the power supply as possible.
Extruder
If you are not going to upgrade the hotend assembly with one that has a direct drive extruder. Upgrading to dual gear drive is a good idea, the stock extruder is made of plastic and has the tendency to crack and brake. Make sure to read THIS first.
Future plans
Linear rails
When the v wheels finally give up, I am planing to upgrade to linear bearing. This will also allow for higher accuracy and print speed.
Can bus card
Right now there are 16 wires going from the hotend assembly to the mainboard, it would be nice to reduce them to just 4. It would really help with cable management.
Vinyl cutting head
I had experimented with a design with the previous hotend assembly, it worked but had a few design issues. I am planing on designing a new head that will mount where the input shaping sensor mounts.
Is it worth it ?
One could argue that investing time and money on a cheap old low feature printer is a waste. And from the perspective of someone viewing it as only a tool, that argument would be valid. A Bambu labs X1C even though expensive, works great out of the box and does not need multiple time-consuming calibrations and adjustments. But the things you can learn along the way make the journey worth it. That’s why I believe it is the ideal first printer. Even when operating an expensive printer like the X1C you need to know hot it works and be able to diagnose and maintain it.